Cách tạo điểm phát sóng di động trên Windows 11

If your Windows 11 PC has an active Internet connection (via Ethernet, cellular modem, Wi-Fi, or another form), you can share that connection as a wireless signal as a hotspot. cellular signal via Wi-Fi or Bluetooth. Here's how to set it up.
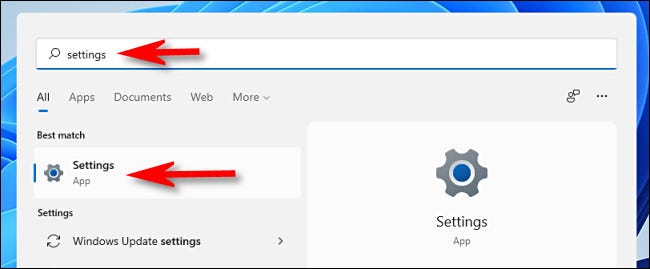
To begin, press the Windows + I key combination to launch the Windows Settings application. Or click the Start button, enter the keyword "Settings" in the search bar, then click the gear icon from the list of returned results.
 When the Settings application interface opens, look at the list on the left and click on the item "Network & Internet". Click on "Mobile Hotspot" in the "Network & Internet" settings screen, which appears on the right (do not press the switch button).
 On the Mobile Hotspot settings screen, you will see several options listed.
 Before activating the mobile hotspot, it is best to configure how it works. First, click the drop-down menu labeled “Share my internet connection from” and select the internet source you want to share, such as “Ethernet” or “Wi-Fi”.
 Next, click the drop-down menu labeled "Share Over" and choose the method you want to use to share your Internet connection with other devices. Normally, you can choose "Wi-Fi" or "Bluetooth", but there may be another option based on the PC's configuration.
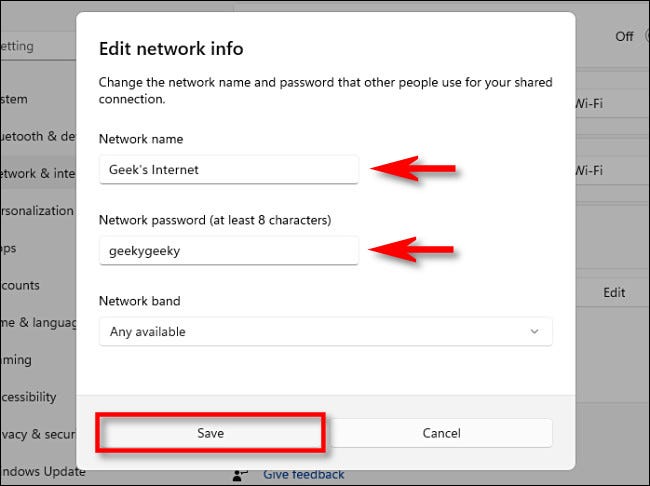
 In the “Properties” section at the bottom, click “Edit” and the “Edit Network Info” window will appear. Here you can set the network name (similar to the Wi-Fi SSID), the password that people must enter to connect to your hotspot, and the Network Band (2.4 GHz, 5 GHz or "Any Available") if you're tethering over Wi-Fi. When the configuration is done, click “Save”.
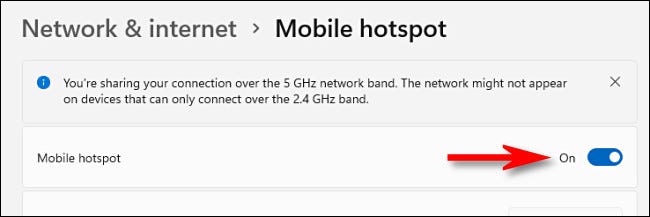
 Finally, go back to the top of the Mobile Hotspot settings window and toggle the switch next to the “Mobile Hotspot” section to the “On” state.
 Your computer is now ready to receive connections to the newly created mobile hotspot.
 If the connecting device supports Bluetooth internet connection, you can connect to your hotspot in the same way.
Good luck!
Source: https://thewindowsfan.com/cach-tao-diem-phat-song-di-dong-tren-windows-11/
 When the Settings application interface opens, look at the list on the left and click on the item "Network & Internet". Click on "Mobile Hotspot" in the "Network & Internet" settings screen, which appears on the right (do not press the switch button).
 On the Mobile Hotspot settings screen, you will see several options listed.
 Before activating the mobile hotspot, it is best to configure how it works. First, click the drop-down menu labeled “Share my internet connection from” and select the internet source you want to share, such as “Ethernet” or “Wi-Fi”.
 Next, click the drop-down menu labeled "Share Over" and choose the method you want to use to share your Internet connection with other devices. Normally, you can choose "Wi-Fi" or "Bluetooth", but there may be another option based on the PC's configuration.
 In the “Properties” section at the bottom, click “Edit” and the “Edit Network Info” window will appear. Here you can set the network name (similar to the Wi-Fi SSID), the password that people must enter to connect to your hotspot, and the Network Band (2.4 GHz, 5 GHz or "Any Available") if you're tethering over Wi-Fi. When the configuration is done, click “Save”.
 Finally, go back to the top of the Mobile Hotspot settings window and toggle the switch next to the “Mobile Hotspot” section to the “On” state.
 Your computer is now ready to receive connections to the newly created mobile hotspot.
Connect to a mobile hotspot
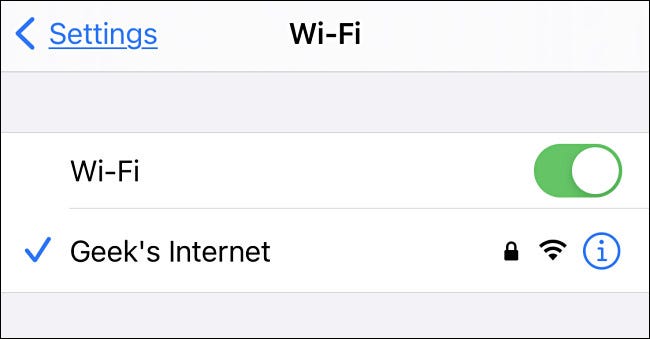
Connecting to a Windows 11 portable hotspot is simple, especially if you're using Wi-Fi. Just go to your device's Wi-Fi settings (e.g., smartphone) and connect to the hotspot you just created above. Enter the password if available. In general, the operation will not be different from when you connect to a regular Wi-Fi network. If the connecting device supports Bluetooth internet connection, you can connect to your hotspot in the same way.
Good luck!
Nhận xét
Đăng nhận xét