How to format a hard drive on Windows
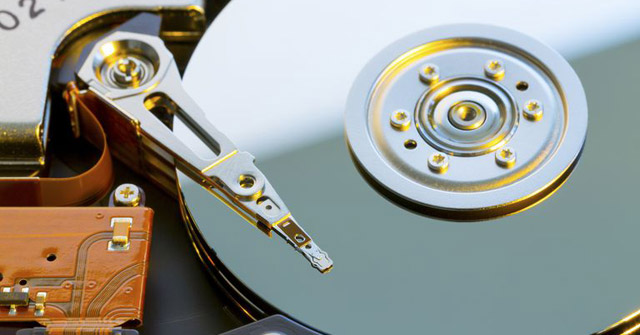
You need to format the hard drive if you plan to use it with Windows. Formatting a hard drive means erasing all information on the drive and setting up a file system so that the operating system can read and write data to the drive. It sounds complicated, but it's actually not too difficult to format any Windows hard drive. This feature is a very basic function that all operating systems have, and Windows has made it pretty easy. Important note: If the hard drive you want to format has never been used or has just been wiped clean, it needs to be partitioned first. For more information, see the following two articles:
  • Instructions to split and merge drives in Windows 7
  • Instructions to split and merge drives in Windows 10
After the hard drive is partitioned, continue with the following steps to format the hard drive. Time Required: The time it takes to format a hard drive in Windows depends entirely on the size of the drive, but the overall speed of the computer also plays an important role. Follow the simple steps below to format a hard drive in Windows 10, Windows 8, Windows 7, Windows Vista, or Windows XP.

How to format a hard drive in Windows

Disk Management

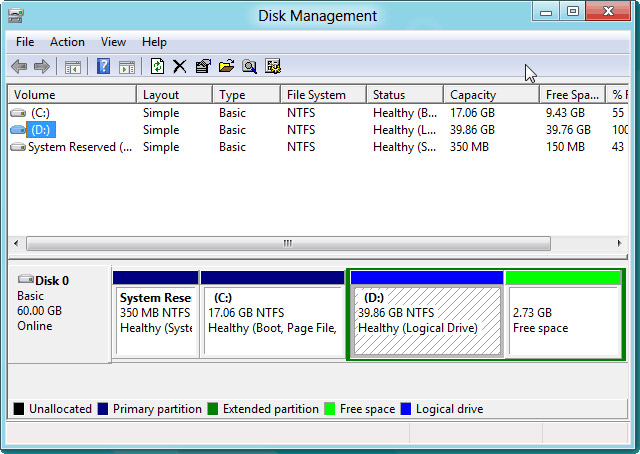
1. Open Disk Management is the hard drive manager included with all versions of Windows. Note: In Windows 10 and Windows 8, the Power User Menu gives you the fastest access to Disk Management. You can also open Disk Management from the Command Prompt in any version of Windows, but opening it through Computer Management is probably easier if you're not very familiar with Cmd commands. Check the version of Windows you are using, if necessary. 2. In the currently open Disk Management, find the drive you want to format from the list at the top. Important note: If the drive you want to format is not in the list above or if the Initialize Disk or Initialize and Convert Disk Wizard message appears, you still need to partition the drive. Partition the drive and then move on to the next step. Note: Drive C or any other drive used to hold the Windows operating system cannot be formatted from Disk Management or from anywhere else in Windows. 3. When you have found the drive to format, right-click or press and hold the drive name, then select Format. The "Format [drive letter]:" window will appear. Warning: Obviously, choosing the correct drive to format is important. Once you start formatting, you can't stop. So, if you're formatting a drive with data on it, double-check that the drive is exactly what you want to format by looking at the drive letter and then checking in Explorer.

Chọn ổ đĩa cần format

4. If you're formatting a new drive, you won't be familiar with the drive letter assigned, and File System will likely be listed as RAW. 5. The textbox in the Volume label will allow you to rename the drive or keep the old name. If this is a new volume, Windows will assign a new volume label. We recommend giving the drive a name to make it easier to identify. For example, if you plan to use this drive to store movies, name it Movies, for example. 6. For File System, choose NTFS unless you have specific needs and want to choose a different File System. NTFS has always been the best File System option in Windows. If you have other specific needs, you can choose FAT32. Other File System FATs are only available as an option on drives with 2 GB or less.
  • How to convert a FAT32 hard drive to NTFS on Windows without data loss
7. Set the Allocation unit size to Default or customize it if you want. But usually, you have no reason to change it. 8. The Perform a quick format option is selected by default in Windows 10, 8, and 7, but you should not select it and instead let the full format run. The quick format will format the hard drive significantly faster than the standard format, but the benefits of the full format are clearly far greater than the quick format. Windows 10, 8, 7, Vista: In a standard format, each sector on the hard drive is checked for errors and erased so that its contents cannot be restored by software (especially useful for used drives). The fast format bypasses bad sector searching and basic data filtering. Windows XP: In a standard format, each sector is checked for errors. This check is bypassed by Quick Format. Windows XP does not support automatic data deletion during formatting. 9. The Enable file and folder compression option is unchecked by default. Note: You can enable file and folder compression to save disk space if desired. However, most drives today have a balance between storage space and drive performance, so this feature doesn't offer much value. 10. Tap or click OK at the bottom of the window. 11. Tap or click OK when it says "Formatting this volume will erase all data on it. Back up any data you want to keep before formatting. Do you want to continue?" appear. 12. The hard drive format will begin. You can monitor the formatting of the drive by viewing the Formatting: xx% progress in Status. Note: Formatting a hard drive in Windows can take a long time if the drive is too large or slow. A 2 GB hard drive can take just a few seconds to format, while a 2 TB drive can take a lot longer, depending on the speed of the hard drive and the computer in general. 13. Formatting is completed when the Status changes to Healthy (a few seconds after the format counter reaches 100%). Windows does not notify you that the drive format is complete. 14. You have just finished formatting or reformatting your hard drive. Now you can use the drive to store files, install programs, back up data, etc., or whatever you want. Note: If you created multiple partitions on your hard drive, you can now return to Step 3 and repeat the steps above to format the additional drive(s).

When the process is finished, the status changes to

Formatting erases data, but not always.

When you format a drive in Windows, the data may or may not actually be erased. Depending on the version of Windows and the type of format, it is possible that the data is still there, hidden from Windows and other operating systems but still accessible under certain circumstances.
  • How to completely erase data from your computer
If the hard drive you reformat never needs to be reused, you can skip formatting and erasing and instead physically or magnetically destroy it.

Some more information about hard drive formatting in Windows

If you want to format your hard drive so you can reinstall Windows from scratch, note that your hard drive will automatically be formatted as part of that process. If you are not satisfied with the drive letter that Windows has assigned during the partitioning process, you have the right to change it at any time! You can also format a hard drive through the Command Prompt using the format command. Reference:
  • A computer hard drive quickly fails; what is the cause?
  • Increase hard drive capacity and speed
  • 3 effective ways to check the hard drive to help periodically check the hard drive's health
Source: https://thewindowsfan.com/how-to-format-a-hard-drive-on-windows/

Nhận xét

Bài đăng phổ biến từ blog này

Nvidia confirms Windows 11 / Windows 10 high CPU usage bug, promises emergency hotfix

How to disable touch screen in Windows 11