The error code 0x80070570 is a common error message on Windows 10 computers, laptops, and tablets. However, it also appears on computers running Windows 8.1, Windows 8, Windows 7, or earlier. So what is error 0x80070570? How to fix this error? The answer will be in the following article.
How does error code 0x80070570 appear?
This message usually appears when an error occurs during the initial installation of the Windows operating system or during the update of an already installed version. Error message 0x80070570 also appears while moving files from one drive to another.
The text of the message will vary depending on the precise cause of the error notice because it frequently provides a thorough explanation of the issue.
For example, a message might say:
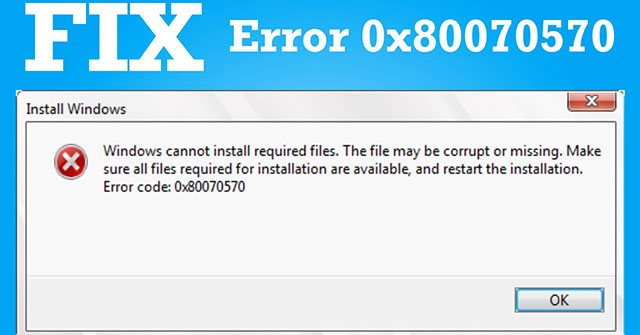
Windows cannot install required files. The file may be corrupt or missing. Make sure all files required for installation are available and restart the installation. Error code: 0x80070570
No matter what the warning text says, it always ends with:
Error code: 0x80070570
Error message 0x80070570
Cause of error code 0x80070570
The occurrence of error code 0x80070570 is usually triggered by a missing or corrupted file. A damaged or faulty drive can also cause the 0x80070570 message to appear, as this can prevent the Windows computer from reading the necessary files correctly.
When an error message appears during a Windows operating system installation or upgrade, it is usually caused by a corrupted installation file that can be created by server-side problems during the download or Internet connection. unstable or weak on your side.
How to fix the error 0x80070570
Since the cause of error 0x80070570 can be difficult to determine, it's worth working through all these potential solutions until the problem is resolved.
1. Restart the computer
Restarting the computer usually fixes random tech problems and is the first thing you try. Before restarting your computer, save all open files and exit any open applications or programs. This way, you won't lose any progress or content.
2. Perform the Windows Update
In addition to giving you access to the latest Windows features and security improvements, Windows update also performs a full system scan and fixes any problems or errors it finds.
3. Reload the Windows Update version
If error 0x80070570 appears during updating Windows, restart the computer and force updating Windows manually. To do so, select Start menu > Settings > Update & Security > Check for update.
When performing a Windows update again, avoid using applications or programs that require Internet access for the strongest possible connection. If you are using a Metered Connection (the Internet connection has data limits associated with it), consider switching to a faster WiFi or wired connection for a stable download experience.
4. Try reinstalling the app
Similar to the advice above, sometimes updating or reinstalling Windows 10 apps will help, so it's worth trying this at least a second or third time before looking for an alternative fix.
5. Check the installation disc for damage
If you are installing software from a CD, DVD, or Blu-ray disc, check if the disc is damaged or dirty. A scratched or dirty disk can make it difficult for the drive to read its contents and can trigger the 0x80070570 warning.
Tip: When cleaning dirty discs, avoid wiping in circles with the cloth. If the disc is scratched, there are many ways to fix it, from using toothpaste or banana peels to coating it with peanut butter and wax. You may also need a professional CD repair kit.
6. Reload the file
If you get error 0x80070570 after opening the downloaded file, it may be corrupt or incomplete. Download again and make sure the download completes properly.
Tip: An easy way to check if a file has been completely downloaded is to check its size. Many websites list the total size of files available for download. To cross-reference this file with the downloaded file, right-click the file's icon on your computer, then select Properties.
7. Check out the official channels
Sometimes, app and video game developers release installation files that are corrupted or not uploaded properly. Usually, the individuals or companies involved will post about these cases on their official Twitter and Facebook accounts. If this is the case for you, wait until a repaired installation file is published.
8. Examine the hard drive for errors
Sometimes, a damaged hard drive can be the cause of the 0x80070570 error message.
Using the method in the article "7 effective ways to check the hard drive to help periodically check the health of the hard drive", which can help scan local drives and external hard drives or storage devices connected to the computer from the USB port.
9. Request a new copy
If the file was sent to you via email by someone else and you are unable to open it due to error message 0x80070570, request that the sender upload a new email and resend it to you.
When doing this, ask the sender not to resend the same email but to manually re-upload the attachment. The file is likely to get corrupted the first time it is uploaded.
10. Exit the app
If you have trouble opening a downloaded file from an application like WhatsApp, Telegram, Line, or Facebook Messenger, exit the application, restart the computer, open the application, and download the file again.
One of the "worst" problems that users often encounter on Windows 10 is the black screen error.
The black screen error can occur in some situations on Windows 10, stemming from problems related to the graphics card, the connection error between the computer and your monitor, the error occurring during the installation of the operating system, updating to new versions, etc., or simply happening randomly at any time.
In the article below, the administrator will guide you with some solutions to fix the black Windows 10 screen error.
In addition, if you encounter a black screen error on Windows 7, 8, or 8.1 computers, readers can refer to the steps to fix the error here.
Steps to fix a basic black Windows 10 computer screen
1. Black screen error during installation
Once there, try turning off the computer by pressing and holding the power button for a few seconds. If using a laptop, you can unplug the charger and remove the battery.
Unplug all unnecessa...
Problems with certain programs may arise as a result of Windows 11's ability to automatically install drivers and replace newer drivers with outdated versions.
Emails, forum posts, and phone calls have all informed us that Reddit It appears that AMD drivers in Windows 11 are being replaced by accident when using Windows Update.
Because of this problem, users may see a message reading "Windows Update may have automatically replaced your AMD Graphics driver" and titled "AMD Software: Adrenalin Edition Warning." Therefore, the AMD Software you have launched is incompatible with the AMD Graphics driver you have installed.
" data-sizes="(max-width: 627px) 100vw, 627px" />
In a proof of concept Unfortunately, the Universal Windows Platform (UWP) driver for Radeon GPU hardware that was installed by Windows Update is incompatible with the version of AMD Software that was previously installed.
It's possible that the manufact...
Microsoft is preparing to launch Windows 12 in the fall of 2024, with a wider rollout in 2025, and it is internally experimenting with several new design ideas, including a new desktop experience with a ‘floating’ taskbar. Microsoft wants to create a floating effect for the taskbar by separating it from the desktop and rounding off the edges.
Microsoft has yet to confirm the existence of Windows 12, but we know it is coming soon; at least, this appears to be the company’s current plan. Microsoft sticks to this new engineering process, we might get Windows 13 in 2027 or later, but the tech giant’s plans are always subject to change as they have in the past.
At the Build 2023 developer conference, Microsoft announced several exciting updates for Windows 11, such as Windows Copilot and AI integration in the desktop operating system. During the event, Microsoft also dropped a hint that it is working on a “next-gen Windows”, which seems to imply Microsoft plans to launch a ne...


Nhận xét
Đăng nhận xét