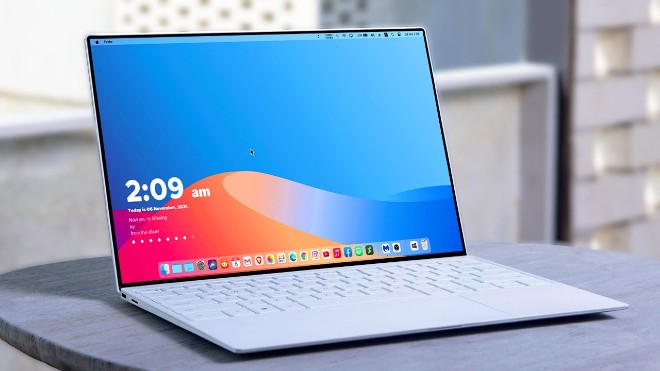
Make Windows 11 look like macOS

Windows 11 is considered more beautiful and aesthetically pleasing than Windows 10. However, not everyone likes the new things that Windows 11 brings. If you have already upgraded to Windows 11 but do not like its interface and do not want to return to Windows 10, you can try the customizations below. Customizing the interface, also known as a custom interface, is not as popular as before. However, it is still very useful in case you want to refresh your computer. In this article, the administrator will show you how to customize the Windows 11 interface to become macOS.

How to make Windows 11 look like macOS

A video tutorial on customizing the Windows 11 interface to become macOS was made by YouTube channel Tech Rifle. To be successful, you will have to combine a variety of custom software, tools, and themes. This process requires you to perform meticulously and accurately. If only one step is wrong, the results will not be as expected, and the installation process will not be successful. Things you need to prepare before proceeding to customize the Windows 11 interface for macOS:
  • The computer with Windows 11 installed. After installing a series of interface customization tools, set the value as high as possible to avoid lag and slowness.
  • Necessary tools and software for customizing the interface:
    • SecureUxTheme
    • LIT3 for Windows by niivu on DeviantArt
    • BIB3 for Windows by niivu on DeviantArt
    • Tool for converting the Windows 11 interface to macOS
    • StartAllBack - Customize the Start Menu and Taskbar for Windows 11
    • Mydockfinder
    • Rainmeter
    • Bluesh by Vinith Kumar on DeviantArt
The procedure is as follows: Step 1: Create a system restore point You need to do this step so you can quickly roll back to Windows 11 if you don't like the macOS interface you're about to install. More information on creating and restoring Windows systems can be found in the following article:
  • Instructions on how to use System Restore on Windows
Step 2: Download SecureUxTheme You access the link pinned above and then download the ThemeTool.exe tool. Next, you need to copy this tool to the C drive and run it as an administrator. HookSystemSettings and Hook LogonUI are checked, and then you click Install. After finishing the installation process, click confirm to restart the device. Step 3: Download and install the themes LIT3 and BIB3 You continue to visit the link pinned above to download the two themes needed for the installation process, LIT3 and BIB3. After downloading, proceed to extract the two themes, access the Windows theme folders, and copy the theme files for macOS into C: WindowsResourcesThemes. Watch the video below to better understand the process. After copying is complete, continue to open the ThemeTool.exe file, click on the names of the files you just copied in the left-hand box, and then click Patch. After the Patch is finished, click LIT3 Mac to select it, and then click Apply. You wait a while for the theme to apply to the system. Step 4: Download Tech Rife's interface customization file This is a custom Tech Rife file that you extract after downloading. First, open the folder numbered 1, and then open the 7TSP GUI.exe file with Administrator rights. In the interface of the tool, select Ad custome pack, and then navigate to the folder numbered 1 in the downloaded file and select 7tsp Big Sur LightMode. Click Start Patching and then wait for the tool to finish its job. After rebooting, you will see the folder and drive icons have switched to macOS. Step 5: You download and run StartAllBack, then configure as shown in the video Step 6: Move the window control to the left and adjust the mouse pointer In this section, note that when you open Run, type shell:startup to put the Leftsider file in the folder containing the programs that start with Windows. Good luck!
Source: https://thewindowsfan.com/make-windows-10-look-like-macos/

Nhận xét

Bài đăng phổ biến từ blog này

Hands on: Windows 11’s redesigned File Explorer with new look, drag & drop for tabs

Nvidia confirms Windows 11 / Windows 10 high CPU usage bug, promises emergency hotfix

Microsoft is bringing OpenAI ChatGPT plugins to Windows 11