5 ways to fix the "Getting Windows Ready" error on Windows 10
Nhận đường liên kết
Facebook
X
Pinterest
Email
Ứng dụng khác
Windows has made great strides over the years and has become the choice of millions of computer users worldwide.
However, for now, Windows 10 computers are still prone to random crashes. A common problem is that Windows gets stuck in the "Getting Windows Ready" loop. Thewindowsfan.com will go over some solutions to this error with readers in this article.
5 useful ways to solve the “Getting Windows Ready” error
Anything can cause this problem on Windows 10, Thewindowsfan.com has compiled the best methods you can take to get back to your workflow. Let's start with the first and most basic way.
1. Give Windows a little more time
Patiently waiting for Windows to update
Sometimes the best thing to do is nothing. If you're not in a hurry, consider leaving the machine running. It's normal for the update process to take a while, especially if you haven't updated your PC in a while or your Internet connection is slow.
Try letting it update all day. If there is still no progress, then the problem may have another cause.
2. Check your Internet connection
Make sure you have a good Internet connection
As noted above, if there's something wrong with the Internet connection itself, then you're obviously going to have a hard time updating your PC. Double check to make sure that's not the case and try to resolve the problem if this is the cause.
If you are using a wired connection, consider the router. Unplug it, let the router rest for a bit, and then turn the router back on to see if that helps. If you are using WiFi, double check that it is working properly. If you think something is wrong, try some fixes or plug in an Ethernet cable.
6 common WiFi network errors and how to fix them
3. Carry out the force shutdown procedure
You can force shutdown to fix the problem
If you've tried the two methods above and are still having problems with the "Getting Windows ready" screen, you should try shutting down your computer.
Note: Only try this method after having done the above methods.
When Windows is updating, an abrupt shutdown can result in damage to important system files. You may even experience the dreaded blue screen of death error on your computer.
Some might say that you won't lose files after a forced shutdown, especially with the new componentization structure that comes with Windows Vista, called Component-Based Servicing. Even so, the article always advises you to act with caution and never bet against the system.
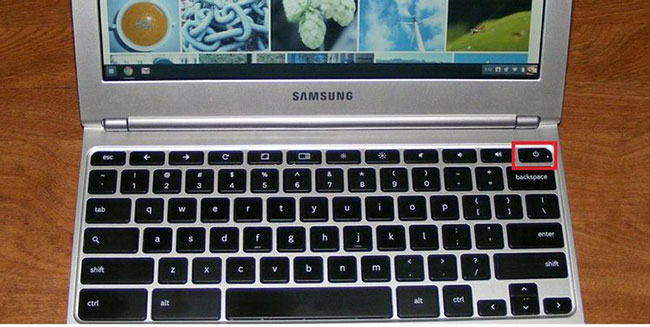
If you decide to give it a try, here's how you can go through the forced shutdown process: If you're using a laptop, press and hold the power button until the system shuts down. After that, reboot the system, and you should see the updates downloaded again or the system will boot normally. If you are using a PC, simply disconnect the power.
If everything goes well, your computer should be up and running again without any problems.
4. Using the Startup Repair tool
Startup Repair is a handy tool that can fix problems
Startup Repair is a handy, free tool found in the System Recovery Options menu on Windows operating systems. It helps you automatically solve many complex problems related to accidental data loss, boot problems, and more. Follow the steps below to get started:
Step 1: Create Windows installation media on USB. If you need advice on how to do this, follow Thewindowsfan.com's instructions on how to create Windows 10 installation media on USB.
Step 2: Start the computer with the USB and select the Repair your computer option from there.
Step 3: From there, select Troubleshoot.
Now, on the Advanced options screen, click Startup Repair.
The Startup Repair option will start looking for errors and problems on the computer and then resolve as many errors as possible. Once the process is complete, shutdown and reboot to see if the problem persists.
5. Perform a factory reset
Factory Reset, as the name implies, completely erases the copy of Windows on your computer. It will then install a fresh copy of the operating system, just like it did when you first bought it. This is a handy tool from Microsoft that can rescue you from all kinds of Windows problems.
Furthermore, it comes with two different reset modes: Keep my files and Remove everything. Keep my files will delete Windows and any additional apps and updates you've installed on it, but keep your documents intact. On the other hand, the Remove everything option will delete everything on the PC and then reinstall Windows from scratch.
Good luck with your troubleshooting!
One of the "worst" problems that users often encounter on Windows 10 is the black screen error.
The black screen error can occur in some situations on Windows 10, stemming from problems related to the graphics card, the connection error between the computer and your monitor, the error occurring during the installation of the operating system, updating to new versions, etc., or simply happening randomly at any time.
In the article below, the administrator will guide you with some solutions to fix the black Windows 10 screen error.
In addition, if you encounter a black screen error on Windows 7, 8, or 8.1 computers, readers can refer to the steps to fix the error here.
Steps to fix a basic black Windows 10 computer screen
1. Black screen error during installation
Once there, try turning off the computer by pressing and holding the power button for a few seconds. If using a laptop, you can unplug the charger and remove the battery.
Unplug all unnecessa...
Problems with certain programs may arise as a result of Windows 11's ability to automatically install drivers and replace newer drivers with outdated versions.
Emails, forum posts, and phone calls have all informed us that Reddit It appears that AMD drivers in Windows 11 are being replaced by accident when using Windows Update.
Because of this problem, users may see a message reading "Windows Update may have automatically replaced your AMD Graphics driver" and titled "AMD Software: Adrenalin Edition Warning." Therefore, the AMD Software you have launched is incompatible with the AMD Graphics driver you have installed.
" data-sizes="(max-width: 627px) 100vw, 627px" />
In a proof of concept Unfortunately, the Universal Windows Platform (UWP) driver for Radeon GPU hardware that was installed by Windows Update is incompatible with the version of AMD Software that was previously installed.
It's possible that the manufact...
Microsoft is preparing to launch Windows 12 in the fall of 2024, with a wider rollout in 2025, and it is internally experimenting with several new design ideas, including a new desktop experience with a ‘floating’ taskbar. Microsoft wants to create a floating effect for the taskbar by separating it from the desktop and rounding off the edges.
Microsoft has yet to confirm the existence of Windows 12, but we know it is coming soon; at least, this appears to be the company’s current plan. Microsoft sticks to this new engineering process, we might get Windows 13 in 2027 or later, but the tech giant’s plans are always subject to change as they have in the past.
At the Build 2023 developer conference, Microsoft announced several exciting updates for Windows 11, such as Windows Copilot and AI integration in the desktop operating system. During the event, Microsoft also dropped a hint that it is working on a “next-gen Windows”, which seems to imply Microsoft plans to launch a ne...


Nhận xét
Đăng nhận xét