How to fix Windows 10 update error 0x800f0988, 0x800f081f, or 0x800f08a
Nhận đường liên kết
Facebook
X
Pinterest
Email
Ứng dụng khác
While updating Windows, you may often encounter different types of update error codes, some of which are easy to resolve and others will take some time to fix.
Recently, some Windows 10 users have reported update errors 0x800f0988, 0x800f081f, or 0x800f08a while installing the Cumulative Update on their computers. Because of this issue, it may be difficult for you to install the latest features and security updates on your computer.
Windows 10 Update error 0x800f0988, 0x800f081f hoặc 0x800f08a
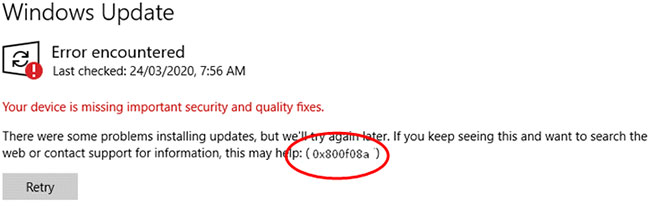
Basically, this error occurs when you try to install the latest Windows 10 Updates on your computer. With this error code, you may see the following error message:
There were some problems installing updates, but we’ll try again later. If you keep seeing this and want to search the web or contact support for information, this may help: (0x800f081f)
Thewindowsfan.com will explain all of the methods that can assist you in resolving this error code in this guide.
Windows 10 Update error 0x800f0988, 0x800f081f hoặc 0x800f08a
How to fix Windows 10 update error 0x800f0988, 0x800f081f, or 0x800f08a
You can follow the suggestions below to fix the problem if you encounter any of the following Windows 10 update errors while installing Windows updates:
1. Running the Windows Update Troubleshooter
First, you need to run the Windows 10 Update Troubleshooter by following the instructions below and see if that fixes the 0x800f08a error.
- Open Windows Settings > Updates and Security > Troubleshoot > Additional troubleshooters.
- Go to the right panel and select Windows Update.
- Now click Run the troubleshooter and let Windows automatically fix the problem. It may take some time to spot the problem, so be patient.
- When the process is complete, close the Settings window and restart the device.
If the Windows Update issue is not fixed, continue with the next solution.
2. Manually download and install updates
This solution requires you to manually download the update; an update that is not installed could be the cause of the Windows Update error 0x80070bc2. So install the update and see if the error goes away.
How to keep your Windows computer up to date
3. Run DISM to repair Windows Update system files
Run DISM to repair Windows Update system files
The Deployment Image Servicing and Management, or DISM, tool can help you fix corrupted Windows Update system files. Since it is a pre-installed command-line tool, you do not need to install it for this purpose. With that said, you should follow the detailed instructions to fix corrupted Windows Update system files using the DISM tool.
4. Check the status of all Windows Update services
There are 3 services you should check when you receive error code 0xc0020036, including:
Windows Update
DCOM Server Process Launcher
RPC Endpoint Mapper
The first service is directly linked to Windows Update, and the latter two are dependencies.
In addition to the live service, you should look for the dependencies of the Windows Update service and see if they are running.
To get started, search for "services" in the Taskbar search box and click on the search results. After opening the Services window, look for Windows Update, the DCOM Server Process Launcher, and the RPC Endpoint Mapper. Check if they are running or not.
Check if Windows Update, the DCOM Server Process Launcher, and the RPC Endpoint Mapper are working.
If not, you need to start those services one by one.
5. Reset Windows Update Components
Unfortunately, if Windows Update error 0x800f08a is still not resolved, you may have to reset Windows Update Components to defaults and check if the problem is resolved.
Reference:


Nhận xét
Đăng nhận xét