Fix NVIDIA Control Panel Not Showing/Missing Windows 11/10
Nhận đường liên kết
Facebook
X
Pinterest
Email
Ứng dụng khác
The NVIDIA Control Panel includes a range of settings for NVIDIA graphics cards. Users can configure graphics settings for games and software from there. So it's a pretty important app for PC users with NVIDIA GPUs.
Some users have reported the problem of the NVIDIA Control Panel disappearing in Windows 11/10. The user cannot find the application on the desktop context menu, in the system tray, or in the Windows Control Panel. Therefore, they cannot access the application. This is how you can fix the NVIDIA Control Panel disappearing in Windows 11/10.
1. Check and enable all NVIDIA services
The problem of the NVIDIA Control Panel disappearing can arise because some NVIDIA services are disabled. Therefore, enabling and starting all NVIDIA services is one way you can restore the missing graphics control panel in Windows 11/10.
Here's how to enable NVIDIA services:
Step 1: Right-click the Start menu button to open the Power User menu, and select the Run shortcut there.
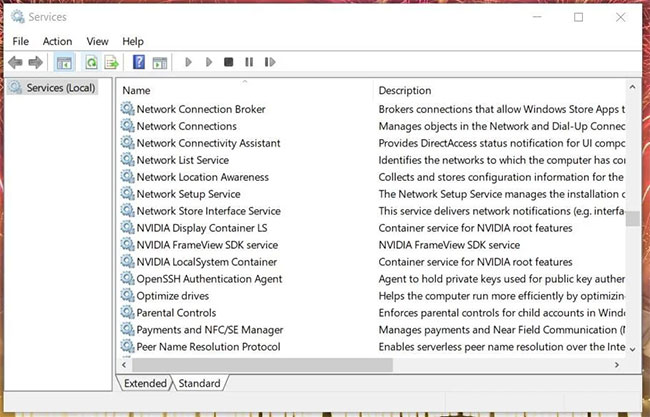
Step 2: To open the Services window, type services.msc into the Open box and press OK.
Step 3: Scroll down to NVIDIA services, as shown in the snapshot below.
Services windowStep 4: Then double-click any NVIDIA service listed there.
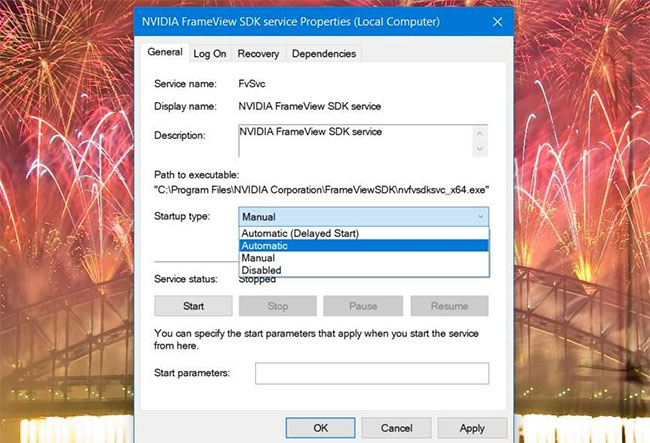
Step 5: On the Startup type drop-down menu for that service, select Automatic.
Automatic optionStep 6: If the service is not running, click the Start button.
Step 7: Select the Apply option to save the NVIDIA service settings.
Step 8: Click OK to close the service properties window.
Step 9: Repeat steps 4 through 8 for all the NVIDIA services listed.
Step 10: Restart the PC after changing the NVIDIA service settings.
2. NVIDIA graphics card driver update
Since the NVIDIA Control Panel is intimately linked to the graphics card, it may disappear due to outdated or incompatible NVIDIA drivers. Therefore, you should update the NVIDIA graphics card driver if it is outdated. You can do it manually or with third-party driver updater software.
3. Reinstall the NVIDIA graphics card driver
If your NVIDIA graphics card already has the latest driver, try reinstalling its driver. This is how you can reinstall the driver for the NVIDIA GPU.
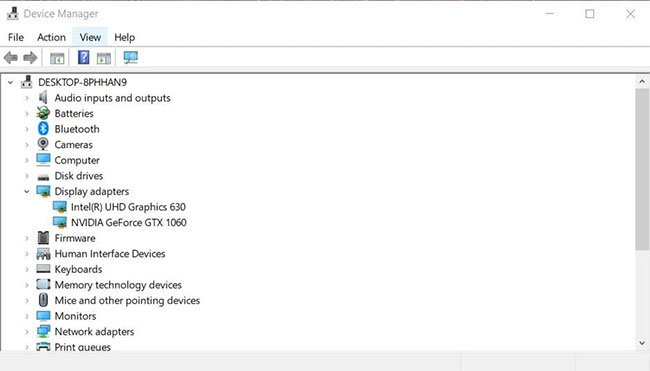
Step 1: Open the Power User menu and select the Device Manager option on it.
Step 2: Double-click the Display adapters category to view its devices.
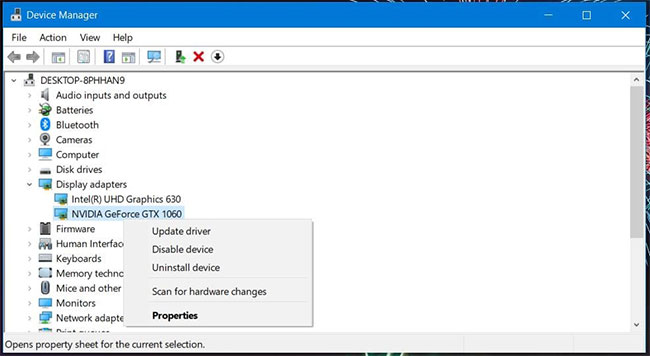
Display adapters folderStep 3: Right-click on your NVIDIA graphics card to select the Uninstall device option.
Uninstall device context menu optionStep 4: On the confirmation prompt that appears, select the "Delete the driver software for this device" option.
"Delete the driver software for this device" checkboxStep 5: To confirm, click the Uninstall button.
Step 6: Restart the PC.
Step 7: Download and install the latest NVIDIA driver pack for your graphics card.
4. Try opening the NVIDIA Control Panel from File Explorer
Try searching for NVIDIA Control Panel in File Explorer. The specific file to open the Control Panel to find is nvcplui.exe. If you can find nvcplui.exe in Explorer, then you can try opening it from there. These are the different directory paths you will need to find the nvcplui.exe file in:
If you cannot find the Control Panel Client folder, then nvcplui.exe may be located in the WindowsApps folder specified above. However, WindowsApps is not an easily accessible folder. You will need to take ownership of that folder to open it.
Find nvcplui.exe
If you find the nvcplui.exe file in Explorer, right-click it and select Run as administrator to open the NVIDIA Control Panel. Then click Desktop at the top of the window. Select the Add Desktop Context Menu and Show Notification Tray Icons options to restore it to the system tray and desktop context menus.
Restoring the NVIDIA Control Panel
5. Copy the NVDisplay.Container file to the Startup folder
"NVDisplay.Container" is the filename of the NVIDIA Display Container LS service. Adding that file to the Windows Startup folder can also fix the NVIDIA Control Panel disappearing error. Here's how you can copy that file to the Startup folder:
Step 1: Open the Services window as outlined in step 1 and step 2 of the first solution.
Step 2: Double-click the NVIDIA Display Container LS service to open its window.
Step 3: Copy the path to the specified executable in that window using the Ctrl + C hotkey.
Copy the path to the executableStep 4: Click OK to exit the properties window and close the Services application.
Step 5: Open File Explorer and select the C:. drive.
Step 6: Paste the copied path into the folder address bar with the Ctrl + V hotkey and press the Enter key.
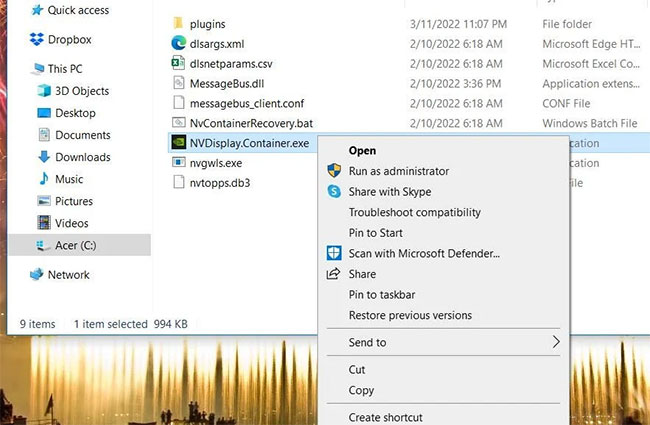
Step 7: Then right-click the Display.NvContainer file to select the Copy option on the context menu.
Select CopyStep 8: Open Run and type shell:startup in the Open box.
Step 9: Right-click inside the Startup folder to select the Paste shortcut option.
Select PasteStep 10: Next, right-click the Display.NvContainer file and select Properties.
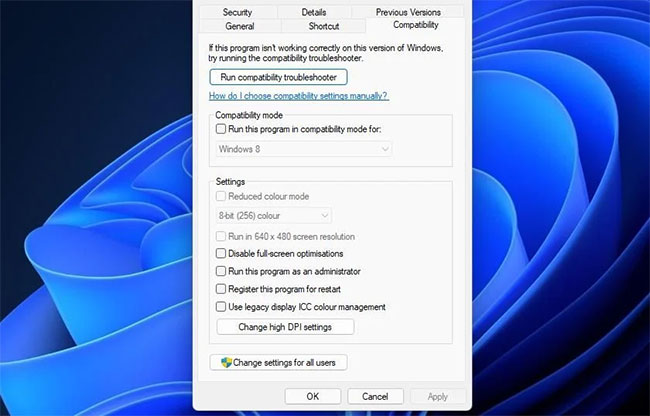
Step 11: Select Run as administrator on the Compatibility tab shown directly below and click the Apply button.
Select Run as administratorStep 12: Finally, restart the computer.
6. Reinstall the NVIDIA Control Panel
As a last resort, try reinstalling the NVIDIA Control Panel. You can reinstall NVIDIA Control Panel by uninstalling it via Settings as follows:
Step 1: Open Settings trong Windows.
Step 2: Then, select Apps > Apps & features to display the list of installed software.
Step 3: Find the NVIDIA Control Panel app listed there and click the three-dot button.
Step 4: Select the Uninstall option in the NVIDIA Control Panel.
Select UninstallStep 5: Restart the PC after uninstalling the NVIDIA Control Panel application.
Step 6: Click the pinned Microsoft Store app shortcut from the Start menu.
Step 7: Type NVIDIA Control Panel into the MS Store search box.
Step 8: Select NVIDIA Control Panel in the search results.
Select NVIDIA Control PanelStep 9: Press the Get button to reinstall the application.
Although you can configure the graphics options in the game, it is better to apply the general settings through the NVIDIA Control Panel. You can restore your missing NVIDIA Control Panel in Windows 11 and 10 by applying the potential fixes above. You will then be able to access and change the graphics settings there as needed again.


Nhận xét
Đăng nhận xét