Dead or annoyingly stuck pixels on your TFT, OLED, or LCD screen can be easily repaired. Stop staring at the screen, wondering how much time it will take you to send the screen in for repair or replacement. You've wasted enough time grieving over something inconsequential but incredibly annoying, like a "dead" pixel on the screen.
Fix the dead pixels on the screen yourself! If done carefully, this won't get in the way of your warranty and can save you a lot of time and reduce unnecessary anxiety.
So, let's look at how to fix dead pixels on your screen in the following article!
How to check the screen for dead pixels
Refer to the article: How to detect dead pixels on the desktop for some useful screen testing tools for checking dead pixels.
How to Restore Dead or Stuck Pixels on a Screen
Unfortunately, you cannot fix a dead pixel. However, you can fix a stuck pixel. As the article explained above, it is difficult to distinguish between the two. Either way, here are the methods you can try:
1. First, identify dead or stuck pixels by viewing your monitor in different color palettes.
2. To fix stuck or seemingly dead pixels, use a third-party tool to flash pixels with multiple colors. The article recommends UDPixel (Windows) or LCD (online).
3. Finally, you can try a manual method that involves rubbing the stuck pixel with a damp cloth or a pointed but soft object, like a rubber/eraser on the tip of a pencil.
Let's look at these methods and tools in detail.
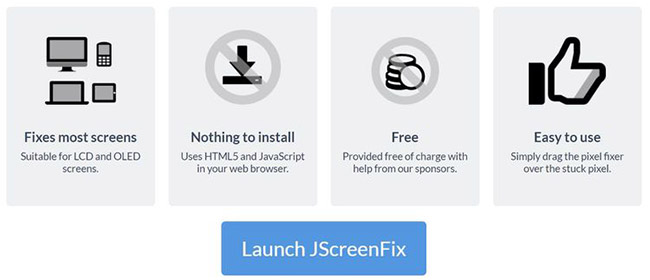
1. JScreenFix (Web)
JScreenFix won't help you find a stuck pixel, but it can help you fix it. Just click the Launch JScreenFix button at the bottom of the page
Click the Launch JScreenFix button at the bottom of the page
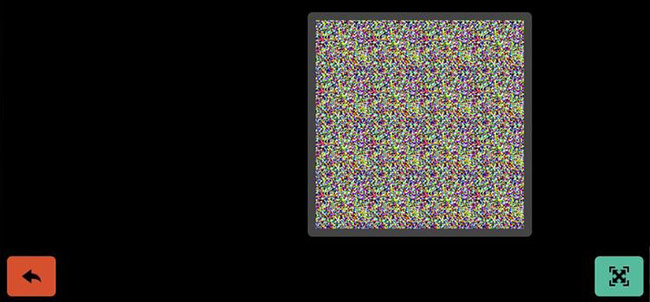
The tool will load a black browser window with a square of blinking pixels. To go full screen, tap the green button in the bottom right corner. Drag the flashing square to where you found the stuck pixel and leave it there for at least 10 minutes.
Drag the flashing square to where you found the stuck pixel
2. UDPixel (Windows)
Download link:
http://udpix.free.fr/index.php?p=dl
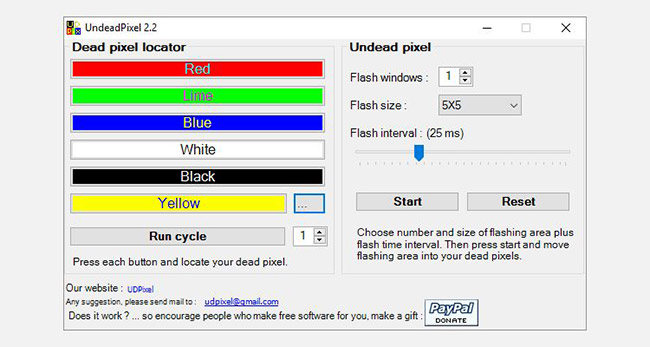
UDPixel, also known as UndeadPixel, is a Windows tool. It can help you identify and correct pixels with a single tool. The program requires the Microsoft .NET Framework. If you don't use Windows or don't want to install any software, scroll down to see the online tools below.
With the Dead pixel locator tool on the left, you can easily spot any anomalies on the screen that have escaped your view so far.
Dead pixel locator tool
If you detect a suspicious pixel, switch to the Undead pixel side, create a sufficient number of flash windows (one window for each stuck pixel), and press Start. You can drag the little blinking windows to where you find the weird pixels.
Let them run for a while, and then finally change the Flash interval.
3. PixelHealer (Windows)
Aureltec built this Windows application as a companion to the InjuredPixels tool to detect dead, stuck, or hot pixels.
PixelHealer allows you to flash a combination of black, white, all primary colors, and custom colors in a draggable window with a custom size. You can even change the flash interval and set a timer to automatically close the app.
PixelHealer
To close the app, click the Close PixelHealer button at the bottom right.
4. Dead Pixel Test and Fix (Android)
This Android tool can both check for and fix dead or stuck pixels on your Android device.
Dead Pixel Test and Fix
Let it run through all the colors in Auto mode to detect if you have any weird pixels on the screen. If so, start fixing it, which will quickly flash the entire screen with black, white, and primary color pixels.
5. Manually fix stuck pixels
If none of these tools solves your stuck or dead pixel problem, this is your last chance. You can combine any of the tools listed above with the magic power of your own hands.
Let's go over a really quick technique:
Turn off the screen.
Take a damp cloth so as not to scratch the screen.
Press firmly on the area where the pixel is stuck. Try not to apply pressure anywhere else, as this can create more stuck pixels.
While pressing firmly, turn on the computer and monitor.
Stop pressing, and the stuck pixel will disappear.
This works because, in a stuck pixel, the fluid in one or more of its subpixels does not spread equally. When the screen's backlight is on, different amounts of liquid pass through the pixel to produce different colors. When you apply pressure, you are squeezing the fluid out, and when you stop pressing, the liquid will most likely push in, spreading around in a uniform manner as usual.
One of the "worst" problems that users often encounter on Windows 10 is the black screen error.
The black screen error can occur in some situations on Windows 10, stemming from problems related to the graphics card, the connection error between the computer and your monitor, the error occurring during the installation of the operating system, updating to new versions, etc., or simply happening randomly at any time.
In the article below, the administrator will guide you with some solutions to fix the black Windows 10 screen error.
In addition, if you encounter a black screen error on Windows 7, 8, or 8.1 computers, readers can refer to the steps to fix the error here.
Steps to fix a basic black Windows 10 computer screen
1. Black screen error during installation
Once there, try turning off the computer by pressing and holding the power button for a few seconds. If using a laptop, you can unplug the charger and remove the battery.
Unplug all unnecessa...
Problems with certain programs may arise as a result of Windows 11's ability to automatically install drivers and replace newer drivers with outdated versions.
Emails, forum posts, and phone calls have all informed us that Reddit It appears that AMD drivers in Windows 11 are being replaced by accident when using Windows Update.
Because of this problem, users may see a message reading "Windows Update may have automatically replaced your AMD Graphics driver" and titled "AMD Software: Adrenalin Edition Warning." Therefore, the AMD Software you have launched is incompatible with the AMD Graphics driver you have installed.
" data-sizes="(max-width: 627px) 100vw, 627px" />
In a proof of concept Unfortunately, the Universal Windows Platform (UWP) driver for Radeon GPU hardware that was installed by Windows Update is incompatible with the version of AMD Software that was previously installed.
It's possible that the manufact...
Microsoft is preparing to launch Windows 12 in the fall of 2024, with a wider rollout in 2025, and it is internally experimenting with several new design ideas, including a new desktop experience with a ‘floating’ taskbar. Microsoft wants to create a floating effect for the taskbar by separating it from the desktop and rounding off the edges.
Microsoft has yet to confirm the existence of Windows 12, but we know it is coming soon; at least, this appears to be the company’s current plan. Microsoft sticks to this new engineering process, we might get Windows 13 in 2027 or later, but the tech giant’s plans are always subject to change as they have in the past.
At the Build 2023 developer conference, Microsoft announced several exciting updates for Windows 11, such as Windows Copilot and AI integration in the desktop operating system. During the event, Microsoft also dropped a hint that it is working on a “next-gen Windows”, which seems to imply Microsoft plans to launch a ne...


Nhận xét
Đăng nhận xét